When I read blogs or any web content, I always pay attention to the text style. Are those text styled easily to read? What feeling do those styled texts bring to me, feel clear or feel a mess?
I have seen many brands use "special" font text in order to make a stronger personality. Those content do attract my eye attention, but I don't have the patience to read through it. I prefer to read the content which is styled professionally.
So how to use CSS to style our text & font?
Now I am going to list Six Common CSS properties which are used for text and font style.
I create a simple HTML page includes two paragraphs, which are copied from my first blog post.
The HTML Part:

The page looks like:


The result:

Arial is my favorite font. If you prefer to use other professional fonts, you can set your own. Just keep in mind, some browsers may not able to run some of the fonts appear on the web page appropriately.


Text-align is for setting your text in "right", "center" or "left" position on the page. I definitely want to set my h2 text in the center of the page.


According to MDN, text-decoration includes underline and line-through. Therefore, I use the nth-of-type selector and set my second paragraph text underline.

The result:
 The final webpage looks like:

I have seen many brands use "special" font text in order to make a stronger personality. Those content do attract my eye attention, but I don't have the patience to read through it. I prefer to read the content which is styled professionally.
So how to use CSS to style our text & font?
Now I am going to list Six Common CSS properties which are used for text and font style.
I create a simple HTML page includes two paragraphs, which are copied from my first blog post.
The HTML Part:

The page looks like:

1. Font-family
I want to make all my text content with font Arial, so I set the<p> and <h2> font-family property value as "Arial".


Arial is my favorite font. If you prefer to use other professional fonts, you can set your own. Just keep in mind, some browsers may not able to run some of the fonts appear on the web page appropriately.
2. Font-size
I want to make h2 text bigger than the current size, so I change the h2 font-size to 30px.
The result:

3.Font-weight
The weight of a font refers to how bold or light weight the text is. I make both of paragraphs text bold, so I set <p> font-weight as "bold".

The result:

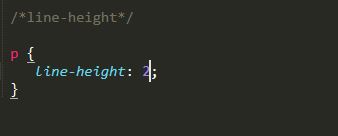
4. Line-height
Line-height is the distance between each line or line spacing. The value is usually between 0 to 3. I set the line-height for each line in paragraphs to be 2 (double spaced).
The result:

5. Text-align
Text-align is for setting your text in "right", "center" or "left" position on the page. I definitely want to set my h2 text in the center of the page.

The result:

6. Text-decoration
According to MDN, text-decoration includes underline and line-through. Therefore, I use the nth-of-type selector and set my second paragraph text underline.

The result:


Comments
Post a Comment